Practical pallets
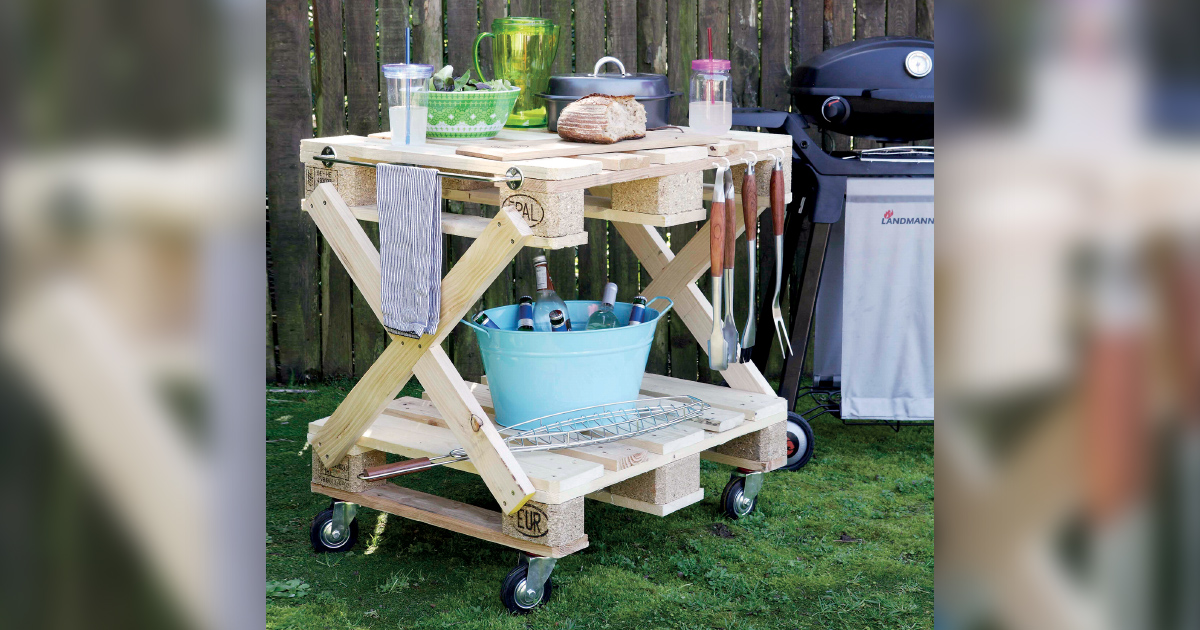
Over the years pallet furniture and crafts have become increasingly popular. Wooden pallets are affordable and easy to find – and they have many uses around the home.
* Measuring tape
* Combination square
* Jigsaw
* G-clamps
* Router with 5/8” bit
* Screwdriver
* Paintbrush

MATERIALS
· 2 euro pallets, 800 x 1 200 mm
· Pine plank, 32 x 69 x 3 000 mm
· 4 rubber wheel swivel casters, 100 mm
· 4,5 x 50 mm chipboard screws (pack of 50)
· 4 x 20 mm chipboard screws (pack of 20)
· 3 x 38 mm white cup hooks (pack of 5)
· Single towel rail 500 mm
· Water-based matt varnish
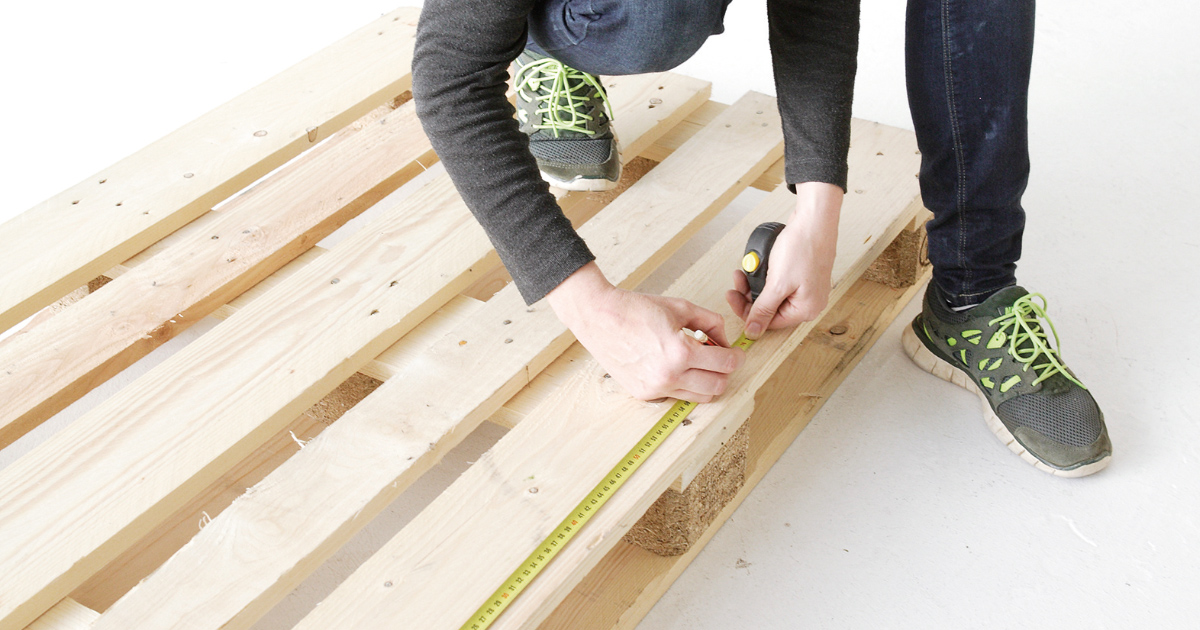
STEP 1
Measure to just past the middle supporting block of one pallet. Use the combination square to draw a line across the pallet on this mark. Use the jigsaw to cut along the line.
STEP 2
Turn the pallet around and do the same on the bottom. Repeat steps 1 and 2 on the second pallet.
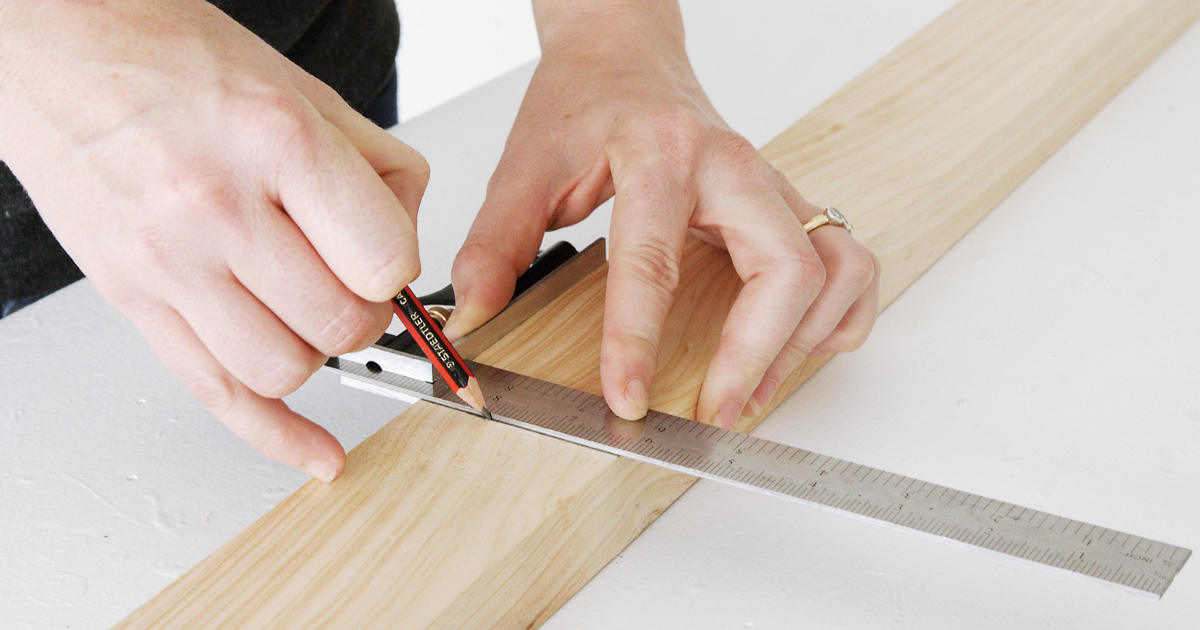
STEP 3
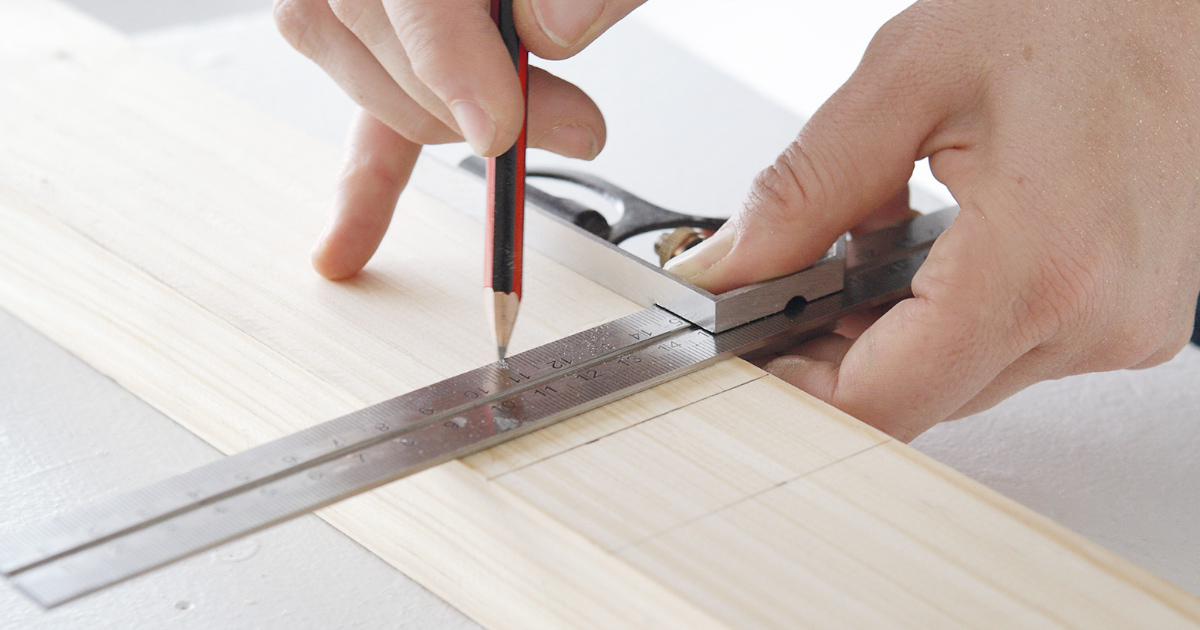
Measure four lengths of 750mm each on the pine plank. Use the G-clamps to secure the plank on your work surface and cut with the jigsaw.
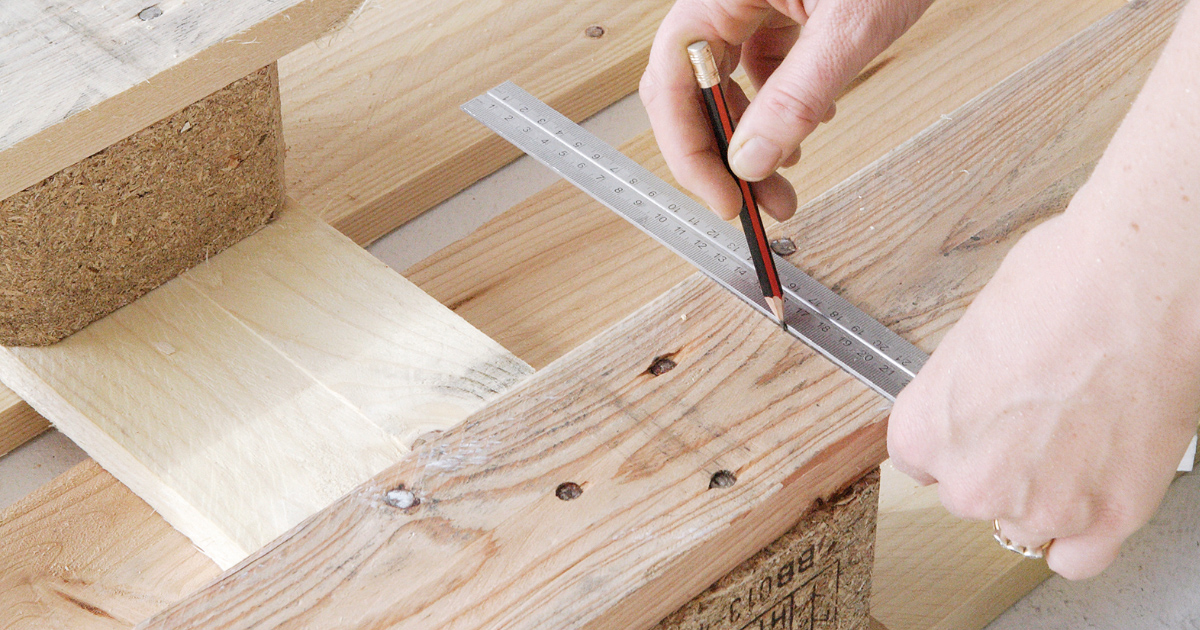
STEP 4
Mark the centre (375mm) on each of the pine planks and draw a line. Then measure 34,5mm to either side of the middle line.
STEP 5
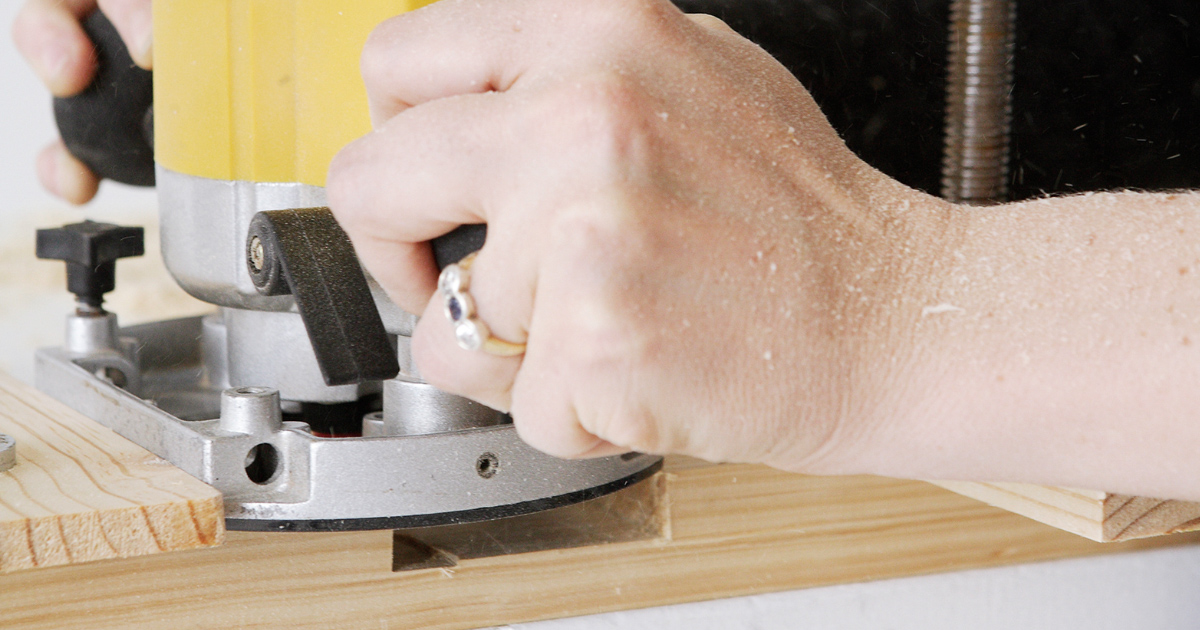
Set the router to cut 16mm deep, and cut away the 75mm area you marked in step 4.
STEP 6
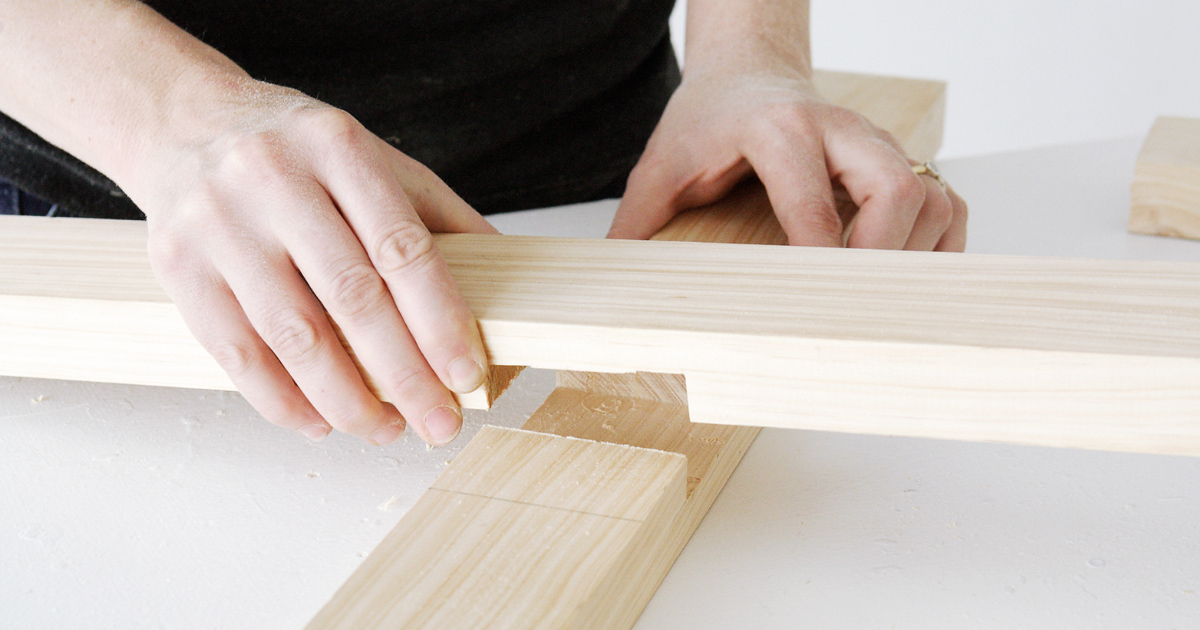
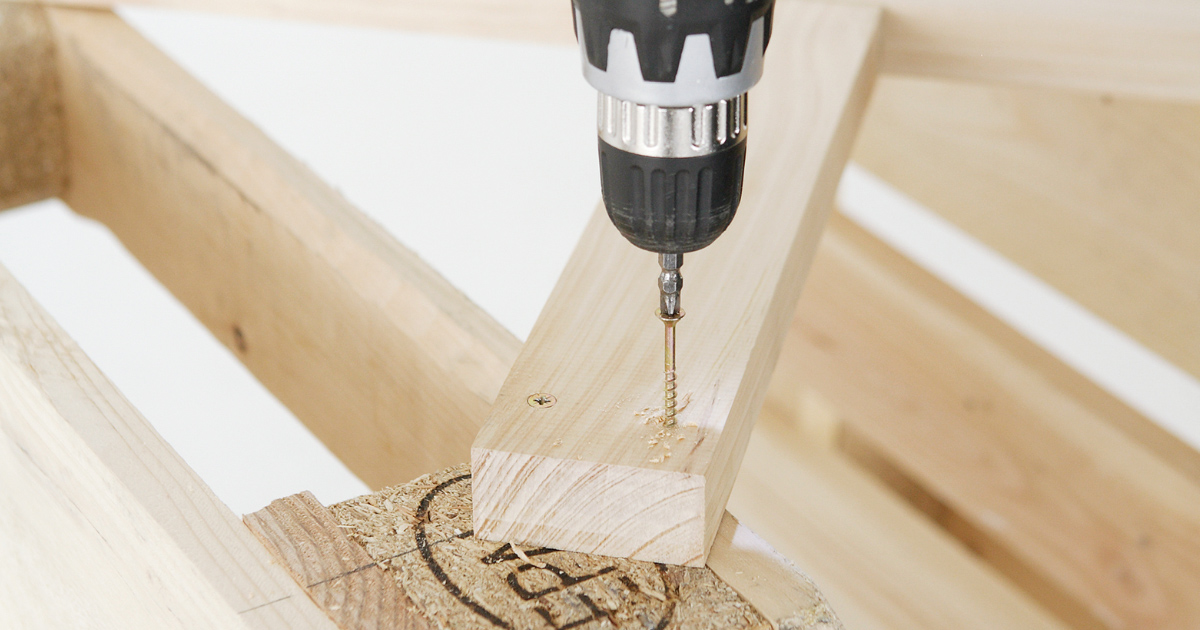
Put two of the planks over each other at a right angle with the indentations facing each other. Screw the planks together. Do the same with the remaining two planks. You should now have two sets of cross legs.
STEP 7
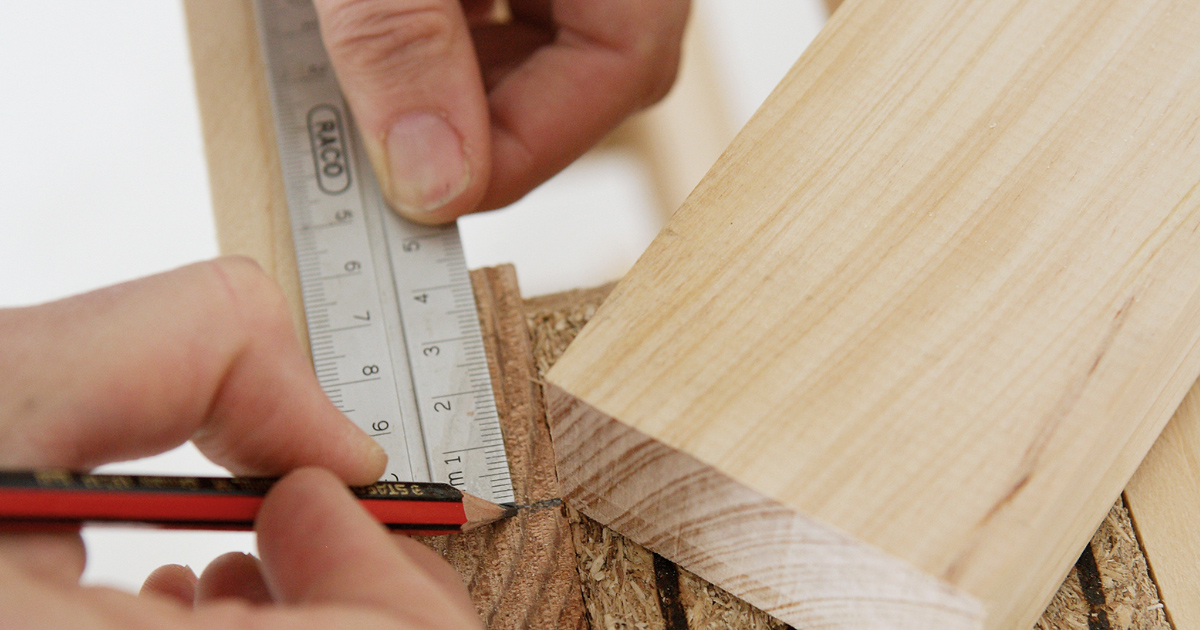
Put the two pallets upright and parallel to each other, with the tops of the pallets facing the same direction, about 60cm apart, and the short sides facing up. Put a cross leg on top. Now measure on the pallets to make sure the cross leg sits in the same position on all four corners of the pallets (a). Ours measured 45mm from the inside of the supporting blocks and 75mm from the top and bottom of the pallets. Once you’re satisfied that the cross leg is evenly spaced on the two pallets, screw it in place with the long screws (b). Repeat on the other side.
STEP 8
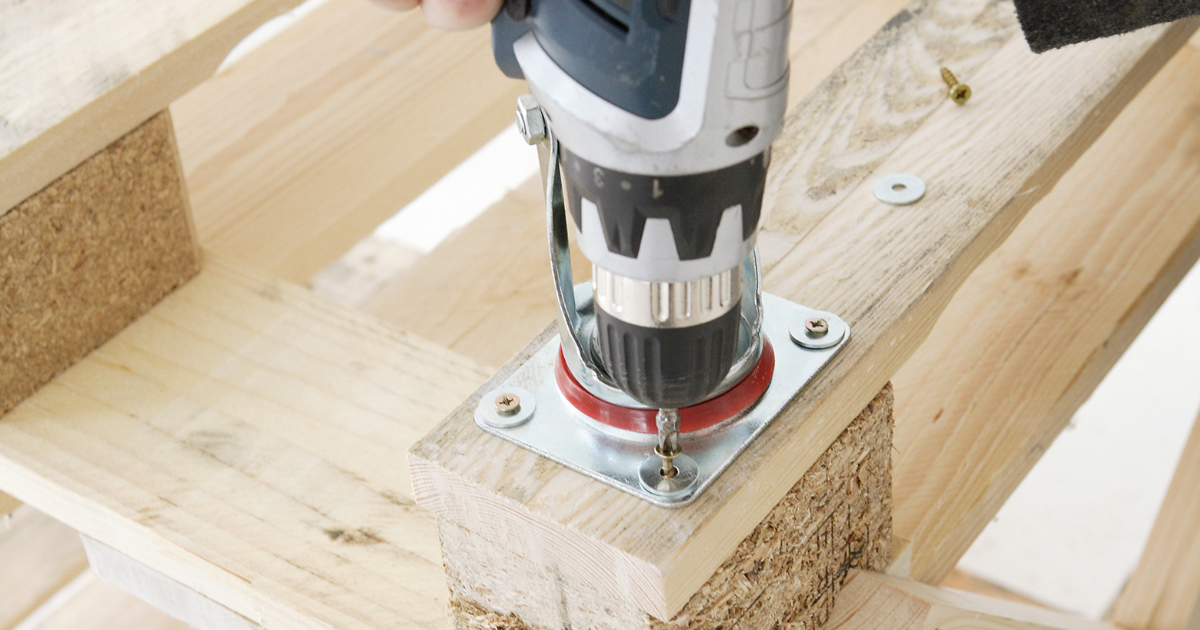
Attach the casters to the base of the table with screws.
STEP 9
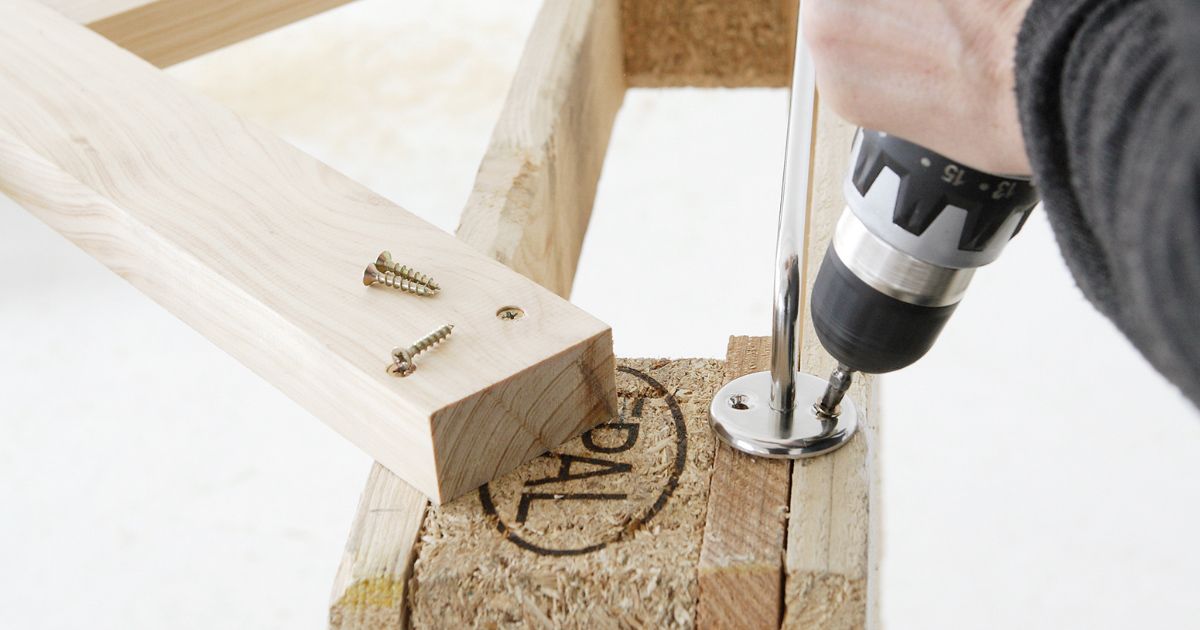
Attach the towel rail to one of the short sides of the table.
STEP 10
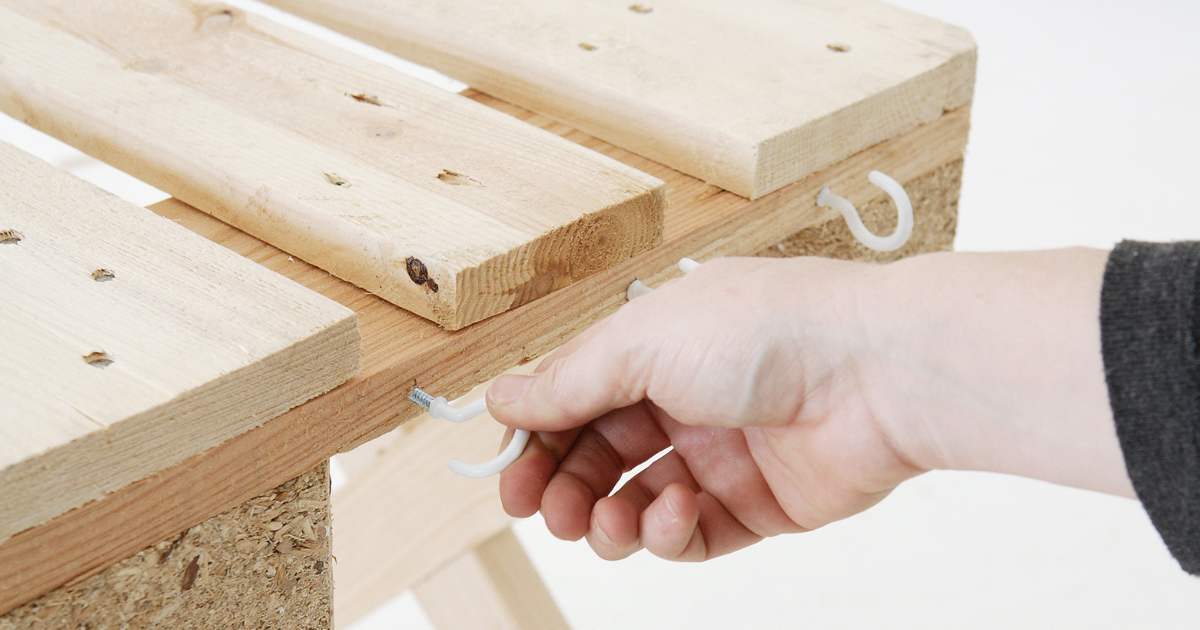
Screw the cup hooks into one of the long sides of the table. You might have to drill pilot holes to make it easier.
STEP 11
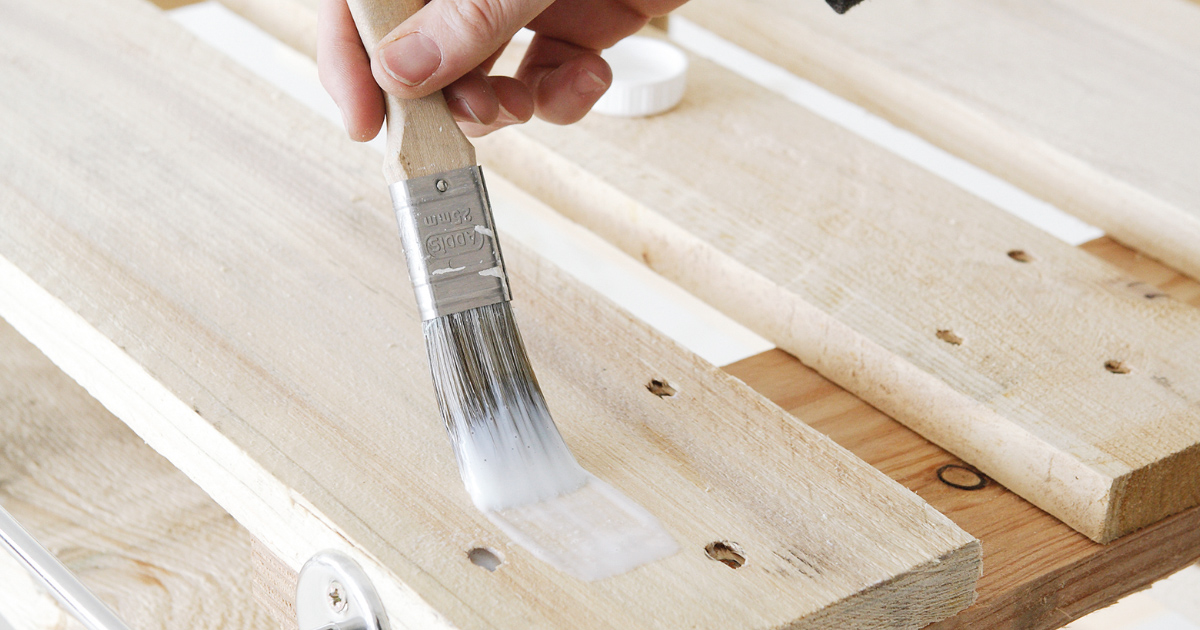
Apply varnish to all the woodwork.
PRETTY AS A PALLET
You don’t have to be the world’s best handyman to make this potplant hanger for small spaces, so why not give it a go? If you have the space and the inclination, you can hang two – one for herbs and one for flowering plants – or even go for three and use one for succulents.

TOOLS
• Pallet
• Medium sandpaper
• Paint or varnish of your choice
• Measuring tape
• Pencil
• Long, strong screws and plastic wall plugs of the same thickness, but shorter (so the screws will stick out of the wall and you can hang the pallet from them)
• Drill
• Long plastic cable ties
• Herbs, succulents or flowering plants in small pots
GET STARTED:
Step 1: Sand the pallet down lightly, just enough to remove any potential splinters.
Step 2: Varnish or paint it in the colour of your choice and leave to dry completely.
Step 3: With the wooden slats horizontal, measure the width of the pallet from side to side.
Step 4: Ask friends or family to hold the pallet against the wall where you want it to hang, in the position you want it. Make pencil marks on the wall to show you the area it will cover from side to side. Also make a mark on either side of the pallet to create a line along which you can drill holes. This line must be aligned to one of the horizontal slats that will be against the wall.
Step 5: Drill four or more holes along the line and put the wall plugs firmly in place in the holes.
Step 6: Screw the screws into the wall plugs so at least 5cm of the screws are sticking out.
Step 7: Hang your pallet on the screws.
Step 8: Drill a hole in the rim of each plant pot and if necessary drill holes in the wooden slats from which the pots will hang.
Step 9: Using the cable ties, attach the pot plants to the slats, and there you have it – a practical and pretty hanging garden!


Latest Jet club magazine
We’ve got the latest trends, exciting prizes and exclusive savings just for you!
Jet Club will not pass your details to anyone else. By clicking the subscribe button you confirm you have read and agree to the Jet Club Terms and conditions and Jet Club Privacy Statement.
Subscribe