How to create an origami dog
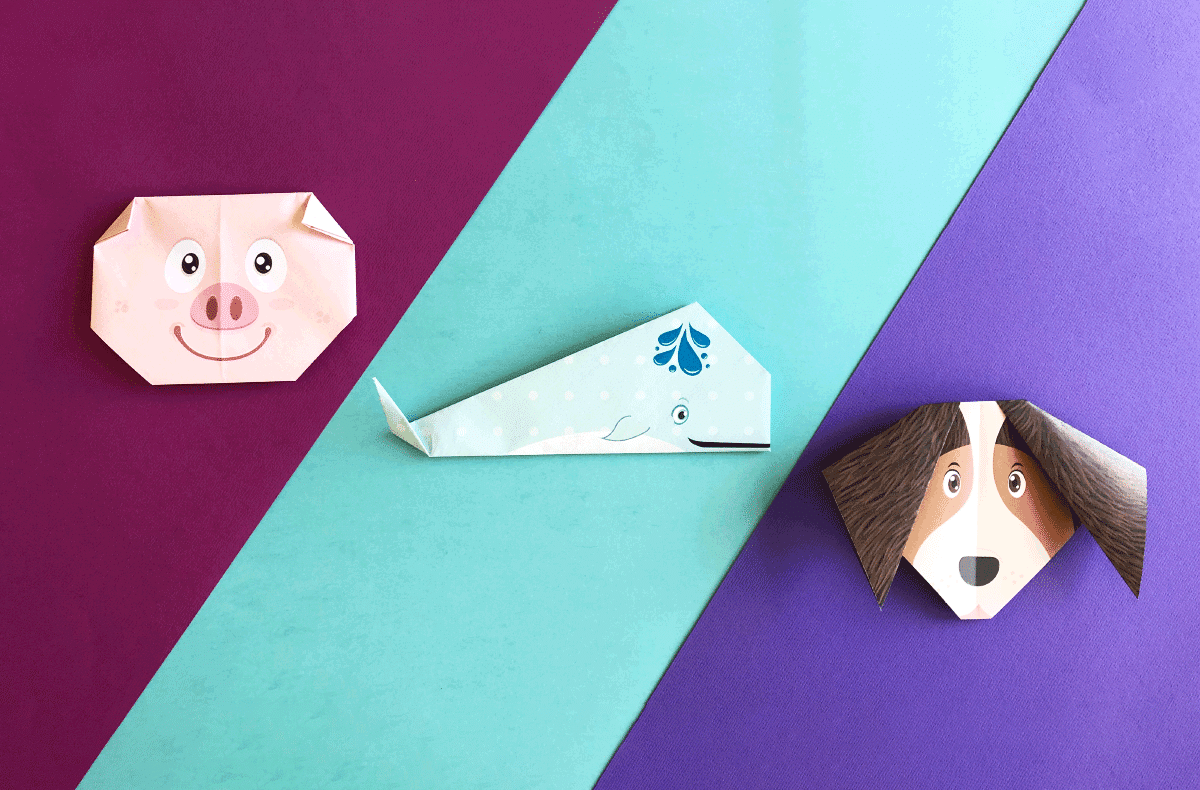
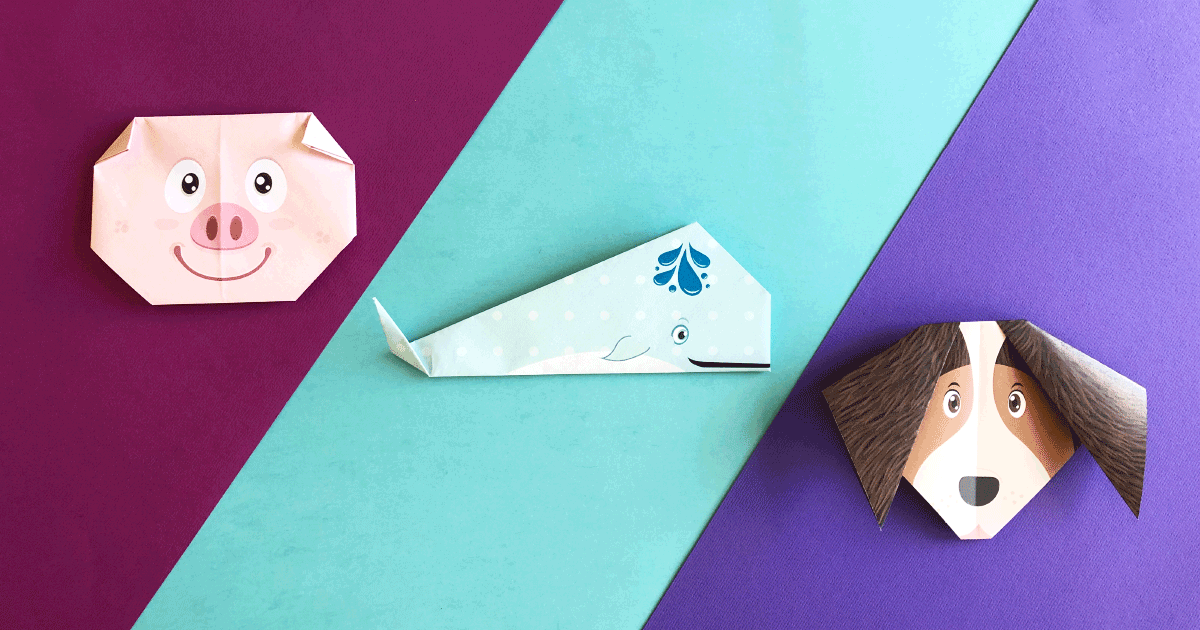
Origami is an easy, inexpensive way to get creative. Today we’ll show you how you can transform an ordinary piece of paper into a cute animal!
Origami has been around for centuries and the word stems from the Japenese words “ori”, which means to fold, and “kami” which means paper. The first known book on origami was Hiden senbazuru orikata, which was published in 1797.
Fast forward 222 years, and we’ve got a few fun origami templates you can try with your family this weekend.
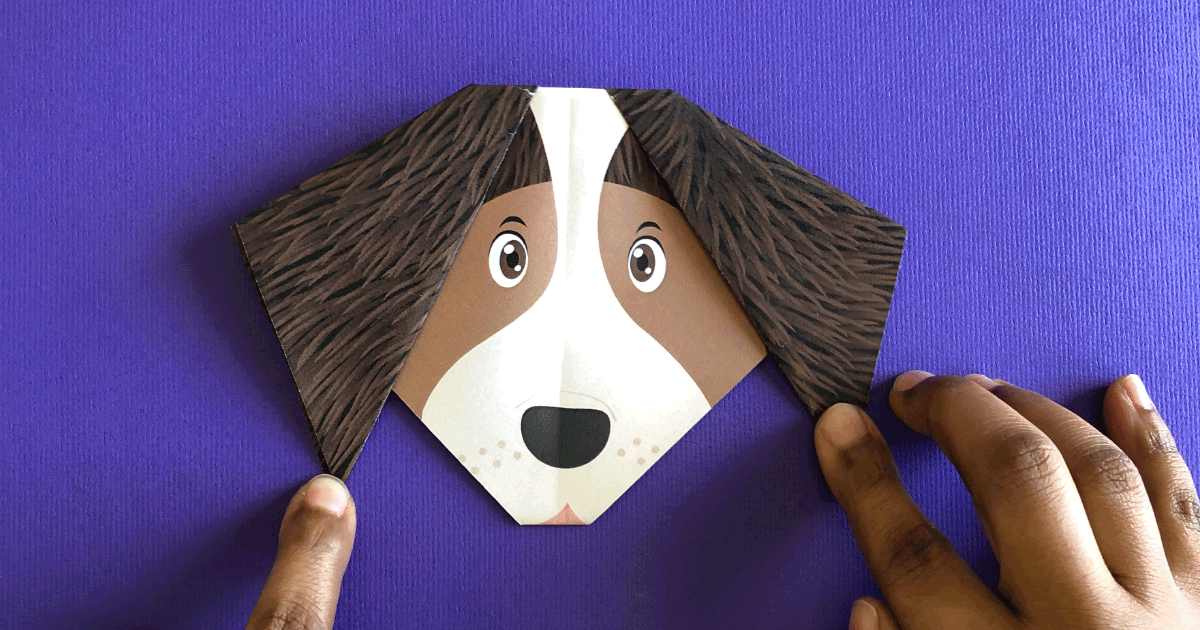
HOW TO CREATE AN ORIGAMI DOG
This cute paper pooch is just what the doctor ordered for the “Mom, can we have dog?” question!
Download the template here.
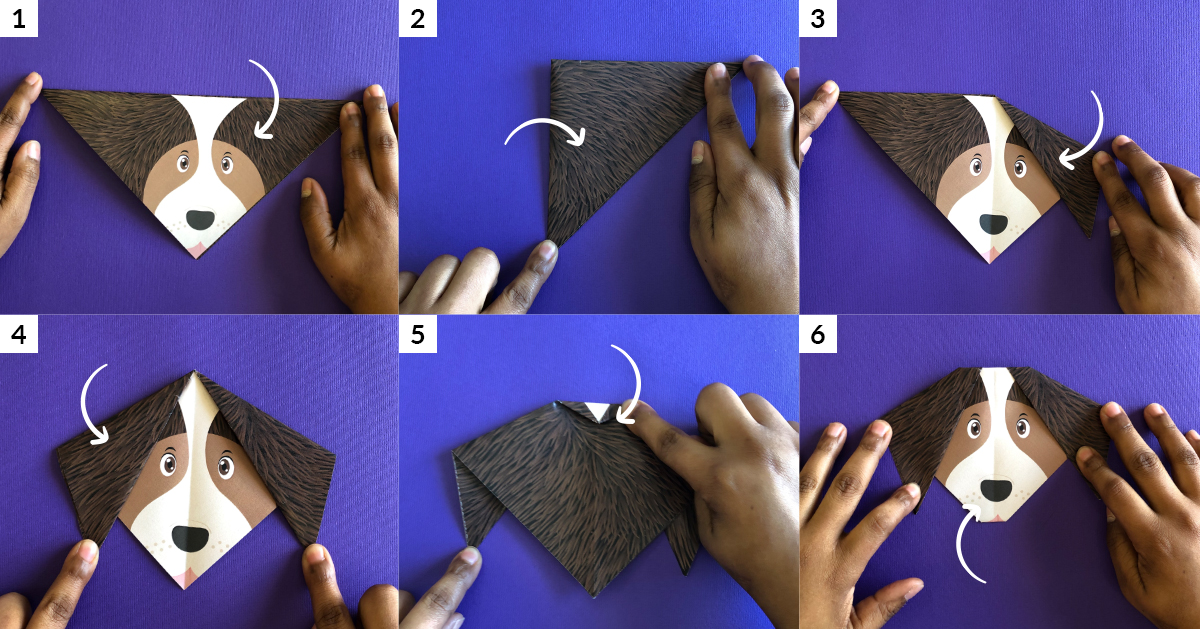
STEP 1
Position the paper as shown and fold it in half from top to bottom. The dog’s face should be facing away from you.
STEP 2
Fold it in half again and make a crease, then unfold.
STEP 3
Fold the right-hand tip down over the dog’s face to make an ear.
STEP 4
Time to make another ear! Repeat step 3, this time folding the left ear.
STEP 5
Fold the top down toward the reverse of the design, so you don’t cover up the dog’s face.
STEP 6
Fold the bottom up along the dotted line, again folding to the reverse side of the template.
Tip: Make this design on a coarse textured paper to make it more tactile for the kids.
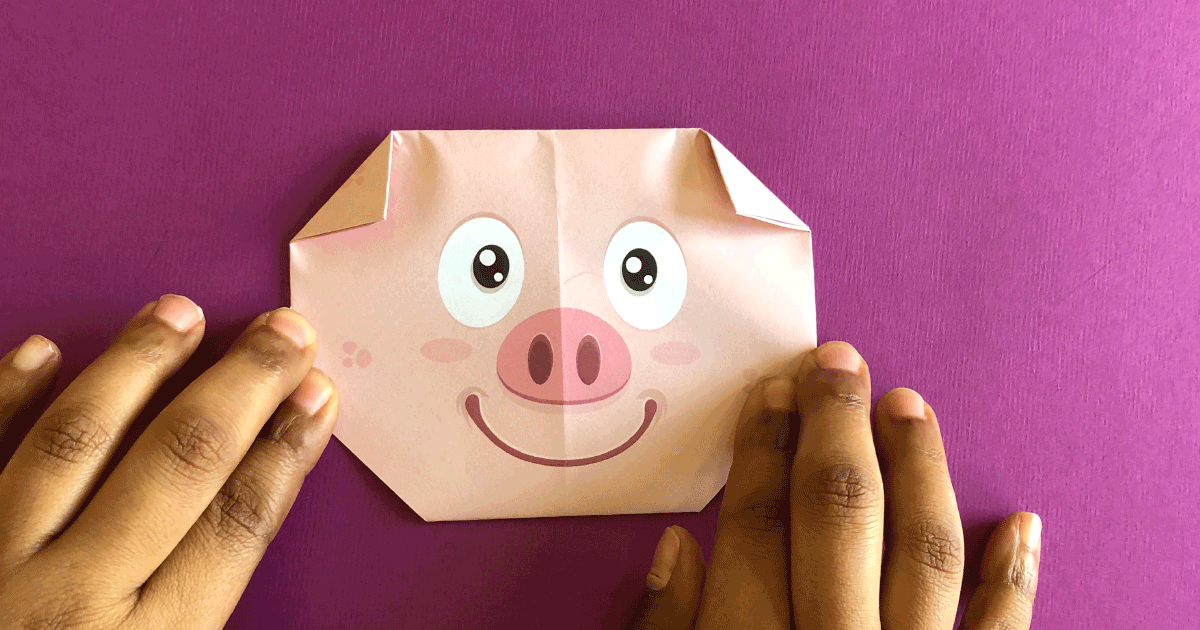
HOW TO CREATE AN ORIGAMI PIGLET
This little piggy went to the playpen!
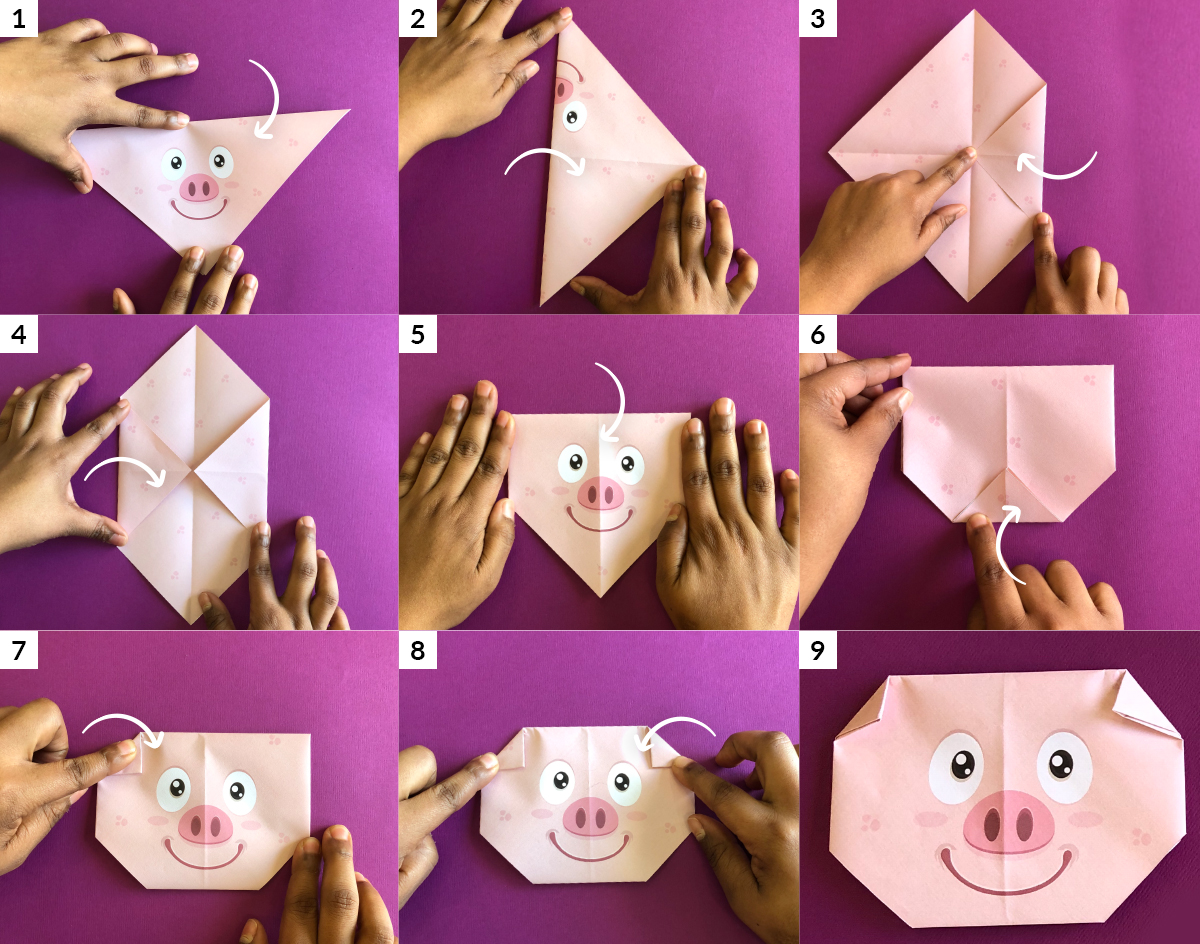
Download the template here.
STEP 1
The piggy’s face should be facing away from you on the reverse side. Position the paper as shown and fold in half, from bottom to top.
STEP 2
Now unfold it and fold it again from left to right.
STEP 3
Fold in the right-hand corner to the centre crease, as shown above.
STEP 4
Repeat step 3, this time folding in the left hand corner.
STEP 5
Fold it in half by bringing the top point to the bottom point.
STEP 6
Fold the bottom up onto the reverse side of the design.
STEP 7
Fold the top left-hand corner to create an ear.
STEP 8
Repeat step 7 by folding the top right corner.
STEP 9
Your piggy is ready!
Tip: Stick buttons in the place of eyes to make the piggy even cuter.
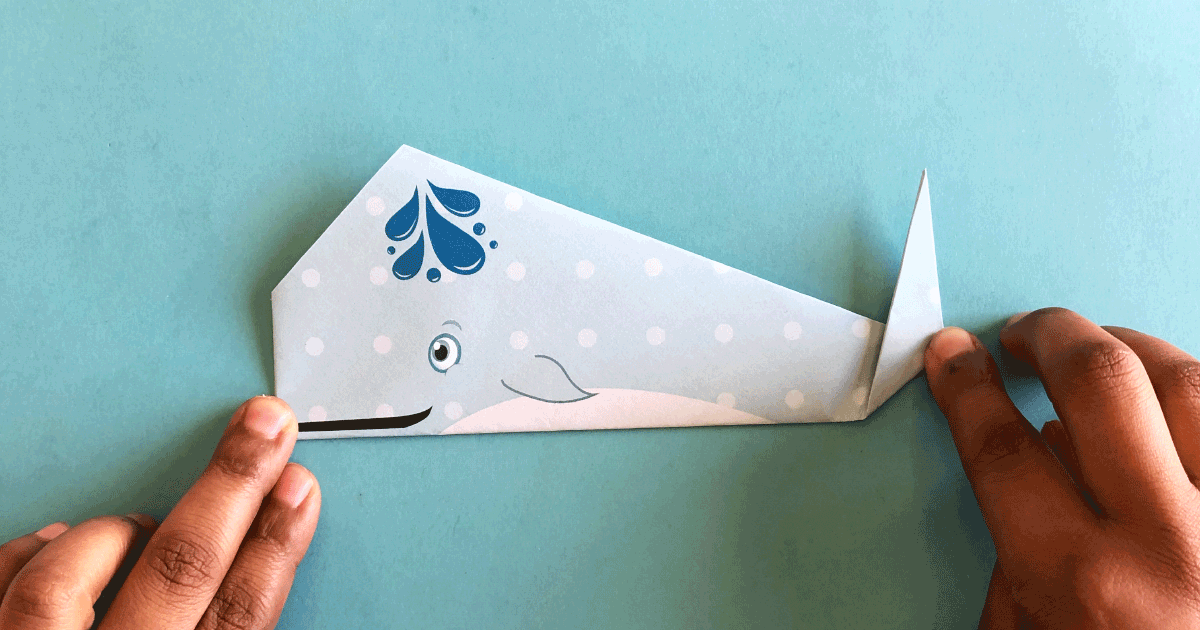
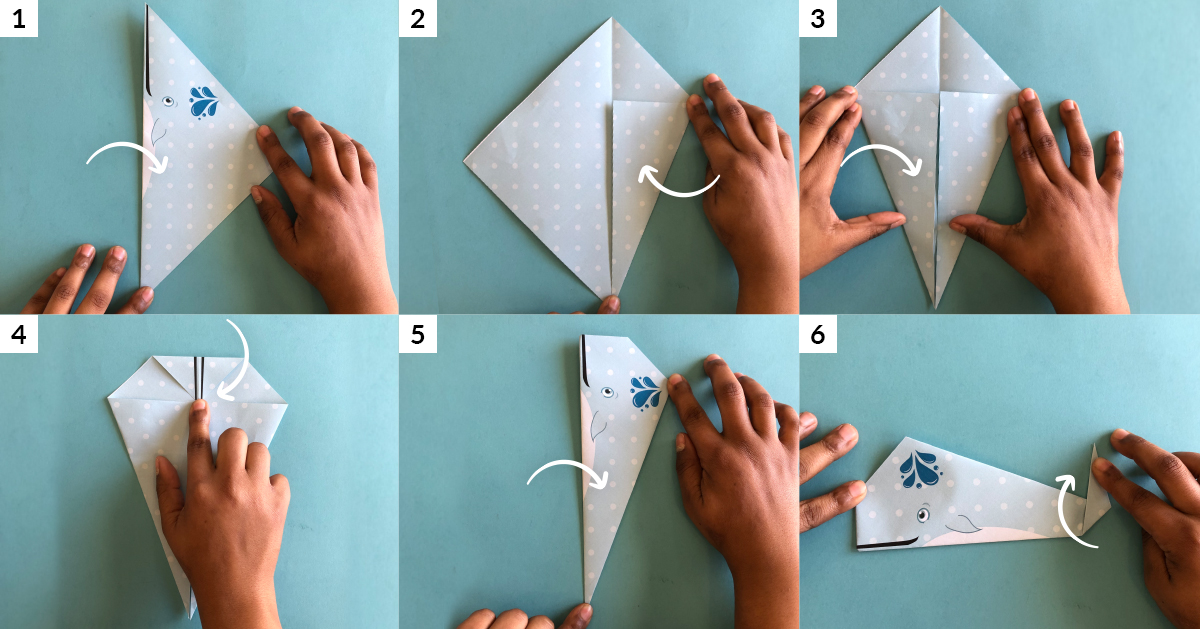
HOW TO MAKE AN ORIGAMI WHALE
Your kids will have a whale of a time with this one!
Download the template here.
STEP 1
Make sure that the whale’s face is pointing away from you, then position the paper as shown and fold it in half from left to right.
STEP 2
Fold the right-hand side in toward the centre and fold it as shown in the image.
STEP 3
Repeat step 2 on the left-hand side.
STEP 4
Fold the top point down to meet the flaps made in steps 2 and 3. Your origami whale should now look like this.
STEP 5
Now, fold the design in half.
STEP 6
Turn your design so it is positioned as above. Then make the tail by folding the left-hand point, as shown.
Tip: Use clear nail varnish on the water drops to make them look wet.


Latest Jet club magazine
We’ve got the latest trends, exciting prizes and exclusive savings just for you!
Jet Club will not pass your details to anyone else. By clicking the subscribe button you confirm you have read and agree to the Jet Club Terms and conditions and Jet Club Privacy Statement.
Subscribe