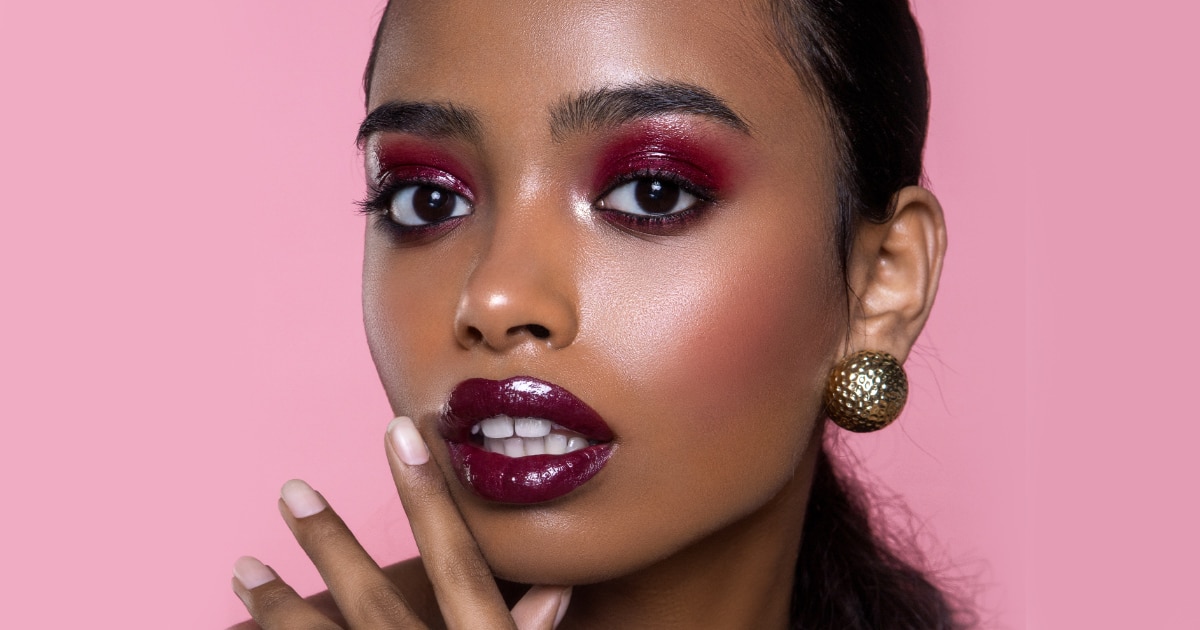
Your guide to applying eye make up
With so many make-up products and tutorials available on Facebook, Instagram and YouTube, finding products and styles to suit you can be confusing – where to start?
In fact, your eyes are a great place to start as they are not only the ‘windows of the soul’ but also the first thing most people see when they look at you. Properly applied make-up can accentuate your good points and play down those you aren’t so crazy about, so first up is to be aware of your good and bad points (if any), your eye shape and colouring. Then you can play with eyebrow shaping, eyeshadow colours, crayon or liquid liners, mascara or faux eyelashes to find the make-up tricks that bring out the best of your beauty.
We’ve put together some basic guidelines on easy ways to apply eye make-up, with advice on everything from the brushes you will need to eyeshadow colours and, most importantly, the correct techniques you’ll need to adopt.
COMMON EYE SHAPES
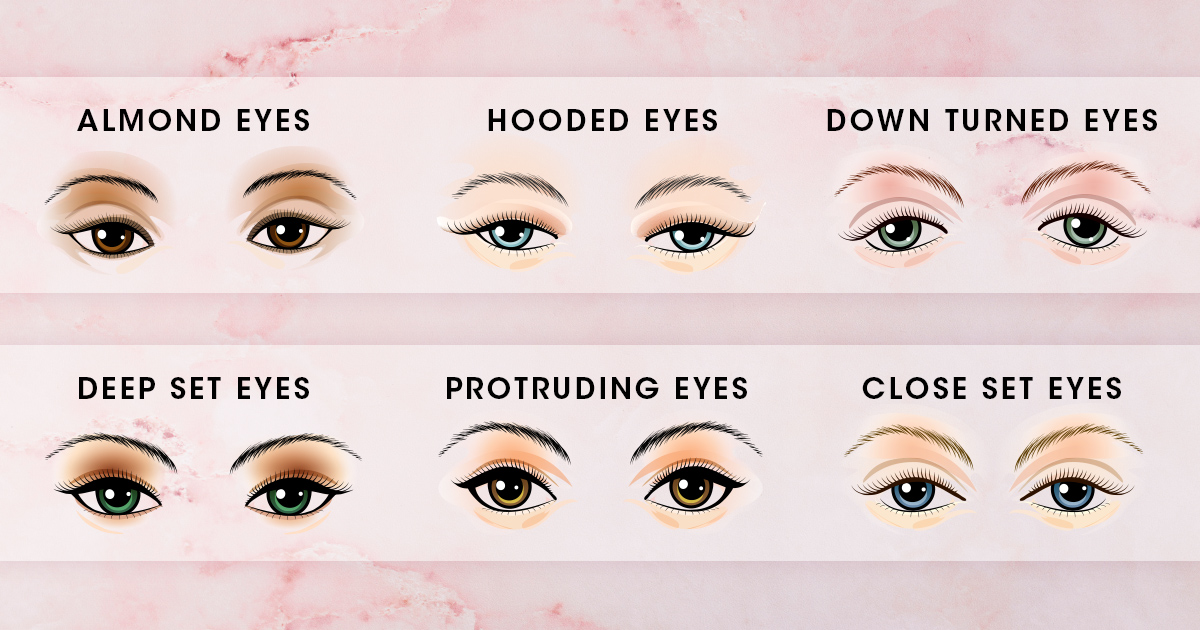
Your eyes, like every part of a person’s body, come in many different shapes and sizes. There are six common eyes shapes: Almond eyes, deep set eyes, protruding eyes, downturned eyes, hooded eyes and close set eyes. Knowing and understanding your eye shape will give you a better chance of creating make-up looks that flatter your face. Here’s a graph to help you.
Let’s get started!
GET THE CORRECT MAKE-UP BRUSHES

Using your fingers to apply eyeshadow is easy and convenient, but if you really want to create beautifully defined eyes you need the proper tools. Invest in a few cosmetic brushes for even and precise make-up application. We prefer synthetic brushes as they are more affordable and easier to clean – and they’re also allergy-friendly.
APPLY A BASE EYESHADOW TO THE LID
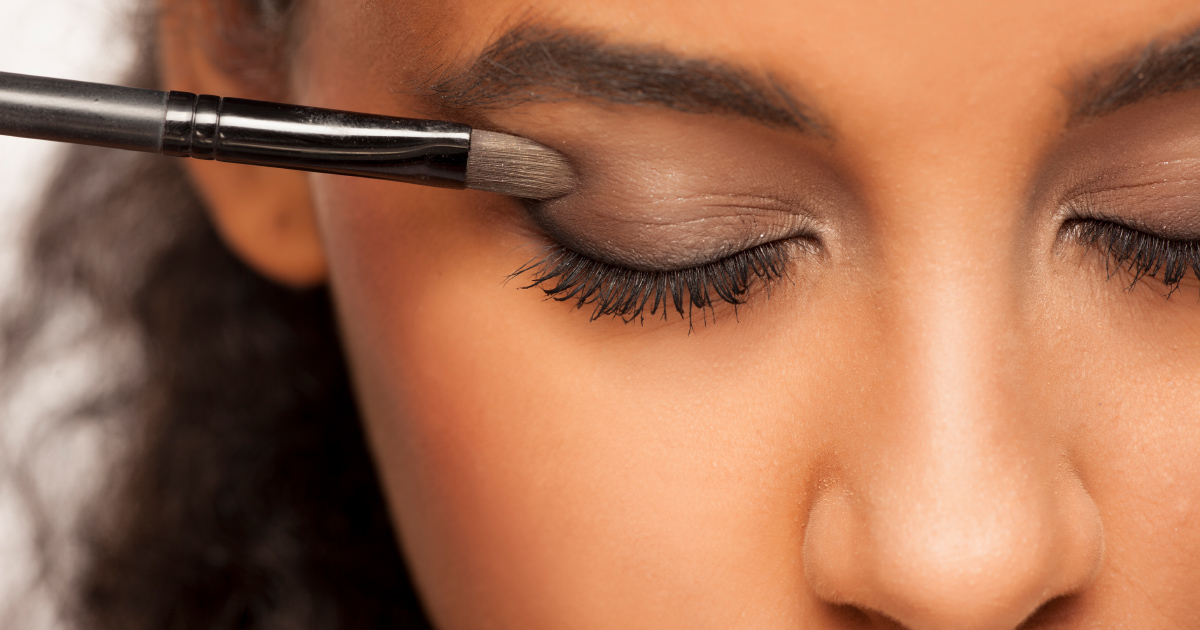
Using your brush, sweep your preferred eyeshadow base onto your eyelid. If you’re aiming for a dramatic smokey eye, bring the base colour all the way up to your brow bone. Or simply apply up to the crease of your eyelid for a more everyday look.
Tip: Use a primer as a base before application. Primer allows smooth application of your make-up and helps keep your eyeshadow in place for hours, even in hot weather or if you’re going to exercise.
CONCENTRATE DARKER SHADOW IN THE CREASE
Dark colours attract light, so using a darker tone in the creases of your eyelids will add depth and definition. Dip a domed brush into a dark eyeshadow and sweep it along the eye socket – following the shape of your eye – from your brow bone to the eyelid. Or, if you have quite heavy eyelids you can use a darker colour just on the eyelids and up to the crease. If you have hooded eyes (the crease isn’t visible when your eyes are open), you will need to take a different approach. Extend the colour up above the crease, otherwise it will disappear when you open your eyes. First use your brush to mark how far up you want the colour to extend in order to be visible. Thenclose your eyes and blend across, smoothing out any lines and focusing on the outermost corners of the eye in a V shape.
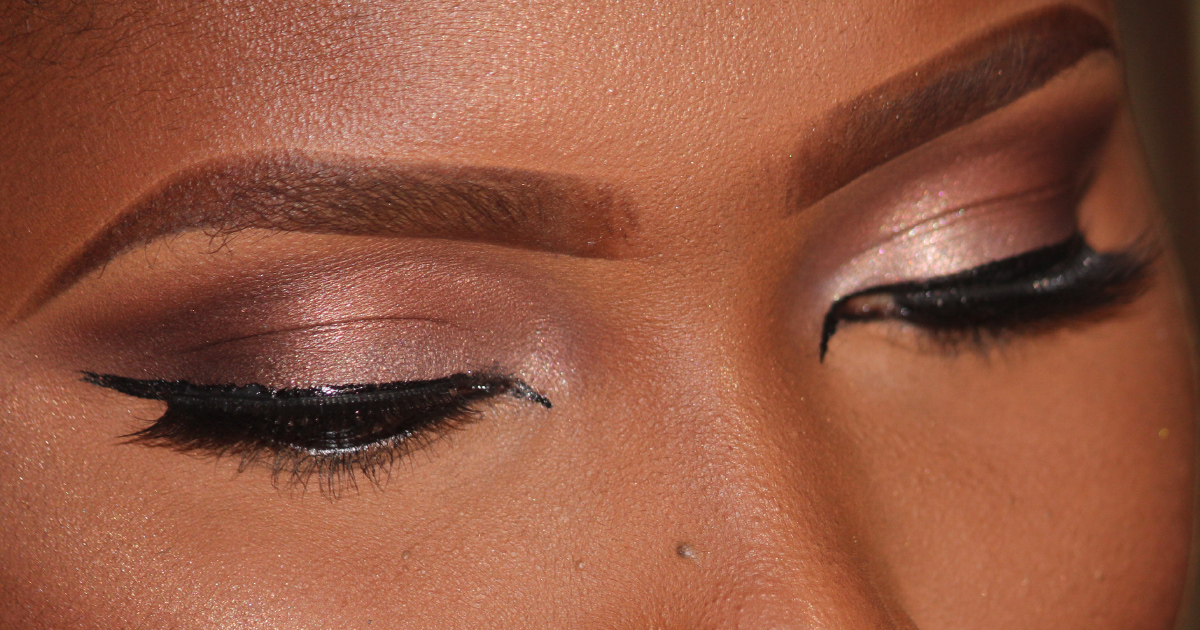
RIM YOUR LASH LINES FOR DEFINITION
Applying a strong layer of eyeliner on top of your eyeshadow in the same shade will create added definition look and make your eyes pop. When eyeliner is applied correctly it can also make your lashes look wider and fuller. Trace your eyeliner from your waterline (the innermost corner of the eye), keeping as close as possible to your lash line, along the lengths of your upper and lower lids.
HIGHLIGHT WITH SHIMMER
To create a super glowing effect, add a shimmery eyeshadow or eye pencil directly under the brow. Choose light, pearly colours and also apply to the inner corners of the eyes to open them up. Finish the look with a few coats of mascara and you’re ready!
HOW TO GET THE PERFECT CAT-EYE
To make sure your eyeliner is not concealed by your lid, create the outer wingtip where the lid’s hood starts. Then work your way inward, applying your liner in thin strokes and widening until you’re satisfied. If you have close-set eyes, draw along the upper lash line from a point that’s in line with your pupil, then make a small flick up at the outer corner (if you use colour right up to the inside corner of the eye, it will make your eyes appear even more close-set). Do the same on your bottom lash line, with the tiniest flick at the outer corner, then apply a touch of concealer between the two wings to widen your eyes and really make them pop.
HOW TO USE AN EYELASH CURLER
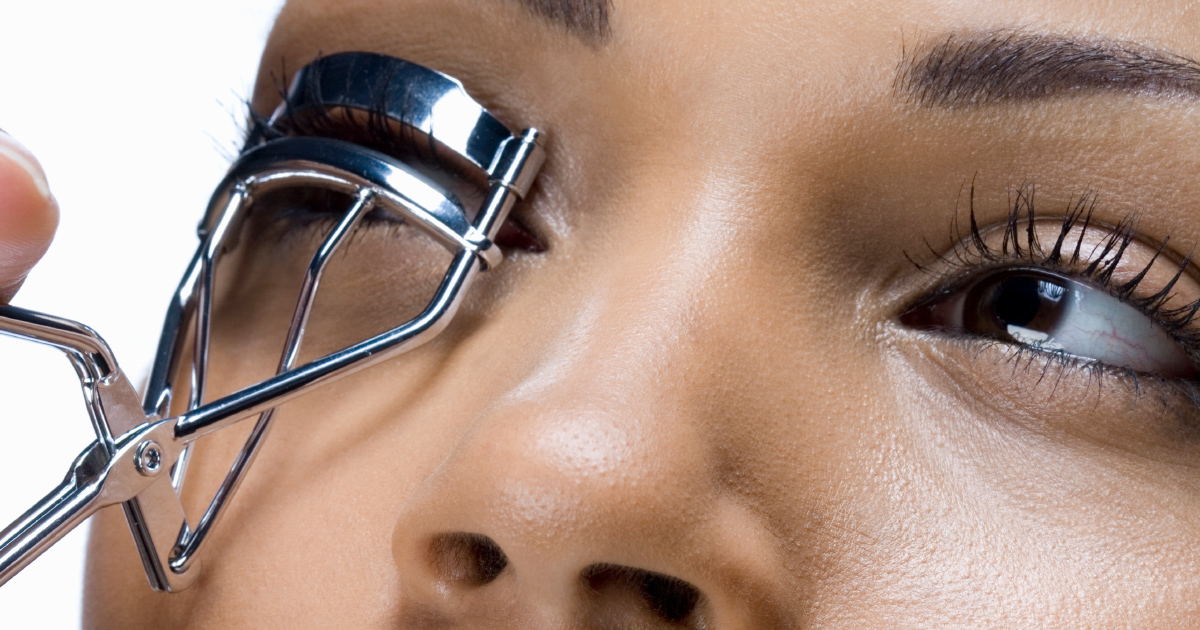
Beautifully curled lashes put the finishing touch to your make-up. If you have been using mascara to help curl your lashes, consider including an eyelash curler in your make-up routine for beautifully combed lashes.
1. Step one is to remove any remaining make-up completely. Never use an eyelash curler after applying mascara, or your lashes will become crusty and gunky and the curler won’t be able to do its work. Use your curler on clean, bare lashes.
2. Start by holding the lash curler up to your eye, with your eyes open. Open the curler and place between your lashes, with the clamps as close to the base of your lashes as possible (but be careful not to pinch your eyelids). Hold for a few seconds, release and repeat the process.
3. Now its time for coats of mascara. Place the mascara brush at the base of your lashes and sweep up to the tips, making sure you completely coat all your lash strands.

Latest Jet club magazine
We’ve got the latest trends, exciting prizes and exclusive savings just for you!
Jet Club will not pass your details to anyone else. By clicking the subscribe button you confirm you have read and agree to the Jet Club Terms and conditions and Jet Club Privacy Statement.
Subscribe